whaawmp 0.2.8
Today Jeff, released whaawmp 0.2.8.Check it out here.
There is a release for Python 2.4 too.
On to Xfce Edition. I still hope to get an iso out this week.
I'm thinking about replacing OO.o with abiword/gnumeric on default installation, if it reduces the iso size enough to fit on one CD.
But there are still things missing, so I will probably end up with a bigger image anyway.
Let's get it out for testing...
Xfce and Google’s Summer of Code
While we haven’t been accepted into the program yet, we (Xfce) are applying to participate in the 2008 Google Summer of Code as a mentoring organisation. Please see our wiki page for more information, and add your name to the students list if you’d like to work on one of the projects. Feel free to add to the project ideas list as well.
If you’d like to act as a mentor, you still have a few more days before I submit the application. Add your name to the mentors list and email me to let me know.
Ristretto, a ‘lightweight’ image viewer
From the moment I started developing ristretto, I mentioned that it was a simple lightweight image viewer. This is a statement which is bound to be disputed by some, and here is the reason why: ‘There is no such thing as a lightweight image viewer‘. And they are right, decompressing an image requires a lot of CPU-power, and a fully decompressed image requires the presence of enough RAM memory in order to do anything usefull with it at any acceptable speed. No image viewer has been able to surpass this limitation, ristretto is no exception to that rule.
So, why do I say ristretto is lightweight? — Because there is more to an image viewer then the two constants I mentioned before, a basic image viewer should:
- Navigate between images in an entire folder
- Display image thumbnails
- Run a slideshow
- Flip / Rotate images
- Read (and interpret) EXIF meta-data, for jpeg images taken by digital camera’s.
- Have well-documented comprehensible code
At this moment, a rudimentary implementation of these features have found their way inside ristretto. Rudimentary, because each component is being looked after if it needs refactoring. The goal is to improve these features until ristretto is a stable and fast image viewer using as little memory as possible (making it relatively lightweight), considering it’s purpose.
I’ve just summed up the first priority of ristretto development; to write a simple and fast image viewer, which does just that: show images.
Any additional features, like importing images from a digital camera (using libgphoto2) or printing images to paper could probably be added through a plugin interface or something. Keeping the basic application simple while allowing individual users to add features they like. If, when and how this is going to be implemented is still a question though ;).
It’s getting there…
Fosdem is over. I heard some talkes, investigated some booths, but the fun thing was meeting Michael, Ken, Antonio, and some other guys there.I guess there are better organized events and meetings out there, but it was worth going there (at least if it's only a 2,5h ride). Unfortunatly I didn't run into any Xfce developer, but a few of them have been there. Hope next time they will have a booths or a devroom (even if they would have to share with Gnome).
I did some improvments to Xfce Edition, added a lot of "unimportant" packages I just forgot (network-manager-applet, gimp, inkscape, evince, brasero).
So biggest issue now is to make gdm start Xfce as default, for new users.
Whaawmp is now working with python 2.4, I added a svn snapshot to Xfce Edition.
Unfortunatly due to gst dvdnav bugginess, it doesn't support dvd menus. C'est la vi.
So long...
SCALE, ebuilds, burning apps, and gtk
SCALE
It's been a coupla weeks now since SCALE 6x, so it's about time for an after-action report.
My wife and I arrived Friday night after suffering a two-hour delay because of heavy traffic. The 405 was the worst. LA traffic always gives me nightmares.
Saturday morning came far too early, but at least we were already registered. We got there the same time as omp, who'd brought a Windows-using friend along as a booth slave--er, volunteer.
Our booth setup included a giant Gentoo poster, omp's desktop rig, and one (occasionally both) of my laptops, displaying Xfce. It was more popular than the extremely minimal openbox desktop, so HAH! We gave out lots of bribes--snacks--and even more LiveCDs. It's too bad we didn't have flyers, business cards, shirts, or other Gentoo swag this year. Lots of folks were asking for them. At least we gave out snacks'n'luv.
Wireless internet sucked throughout the weekend. Apparently it was the same for everyone. Spotty, minuscule bandwidth, and nameservers couldn't be reached. Made it hard to demo things that needed internet access, such as emerging packages, looking up our homepage, or highlighting documentation.
One of our users, calculus, was around much of the time to help out; was nice to see him at SCALE again this year. And wormo made an incognito appearance, too. To all the users and everyone else who stopped by and asked questions, gave feedback, or just chatted -- thank you. You're terrific. I'm always excited to meet a Gentoo user in person. It's like "Really? you use Gentoo? No way!" We were possibly the least-known distro there (tied with Foresight and Damn Small Linux?), certainly the least commercial one. The other distros were all heavyweights: Ubuntu, Red Hat, Suse, Fedora, etc.
Still, we had lots of traffic. Several people wanted to know what's up with Gentoo in regards to our recent legal status issues, so I provided the news in-person, and that seemed to go over well. Curiously, none of the enterprise-level folks were much interested in our legal status. They pretty much all said the same thing: "We're not worried. All the technical development is still there; nothing's changing." It was only the individual users who had all kinds of worries and needed the explanation. The corporate sector wasn't worried at all: "As long as it's still being developed."
There are plenty of pictures of our booth around the 'net in reviews and photo sites; you just have to look for 'em.
I had a blast at SCALE. I plan to attend next year, too.
ebuilds
Lately I've been poking random ebuilds from the tree, posting updates to Bugzilla, creating new local ebuilds, asking for keywords/stabling, and so on. It's a lot of fun. A fair amount of edgy experimentation, but that's what my new laptop is for. Things like wicd that I'd like to see in the tree, or the latest version of brasero.
burning apps
Speaking of burning software . . . brasero seems to be the only actively developed gtk+-based application. Everything else hasn't had a release in years. Xfburn, gnomebaker, graveman, xcdroast....you name it. That's not good news. Brasero is a good choice for my Gnome desktop workstation, but I wouldn't even think of putting Gnome on my laptop, which is a pure Xfce machine. And yet I hate the idea of putting K3B on my laptop even more, because of the ugly, ugly Qt and kdelibs dependencies.
I went ahead and installed brasero on my laptop anyway, since it's gtk+, and it can work with DVDs. None of the other apps I mentioned support 'em. That added 33 huge Gnome deps, including (ugh) nautilus. The irony? K3B only wanted 18 total packages. Still, it's uglier. That's what counts, right?
So thinking about this sad state of affairs for gtk+-based burning apps got me thinking . . . what would it take to create a new one? Something fast, with minimal dependencies, and gtk-based.
gtk
I've skimmed the gtk tutorial and the reference manual before, but only as a passing curiosity. Today I really took a shot at figuring 'em out. This is where I ran into the cliff known as "C programming."
I'm not a programmer. I can do markup languages, I can do some bash, some javascript, little things like that. But I've never been trained in OOP. Or any kind of programming, except some BASIC in elementary school and college. My degree is in theatre, not computer science!
Still, I'm determined to make what headway I can with these gtk+ guides. I've started to see what does what, and why. And some of the necessary parts of an app. Now I need to find out how to get that button press to do something, like . . . burn a CD. Copy a disc. Save an iso. And so on. For that, I've been poking at the source code for Xfburn, libburn, and brasero. This is all still just a bit over my head, but I'm trying, at least.
I've already partly answered my own question of "Why aren't there more up-to-date gtk+ burning apps available?" because I created a sample task list.
Writing a graphical app is a huge undertaking. What burning backend will be used? cdrtools, cdrkit, libburn/libisofs, dvd+rwtools are all possibilities. Same goes for the media types used in writing audio discs. The app has to handle notification (possibly via dbus), disc drive status/detection, set/get write speed, and a dozen other critical tasks. Oh, and it needs to be translatable (those pesky .po files that take up space), and it really should make use of autotools. What other libraries will it use? Will any of its features be optional compile-time switches? Got to add those too. Where will the project be hosted? What VCS? And so on.
Lots of stuff to do. No wonder brasero's the only active gtk+ burning app. And that's too bad, too. It has a ton of dependencies that folks using Xfce or just a WM don't care to install. I'd like to see the huge gap between "brasero" and "nothing" filled by a low-dependency, fast, capable application. I just don't think I'm up to the task of creating it all by myself. ![]()
Design your own desktop with Xfce 4.4 – part 2
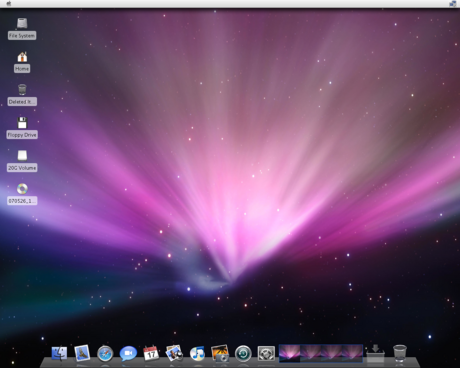
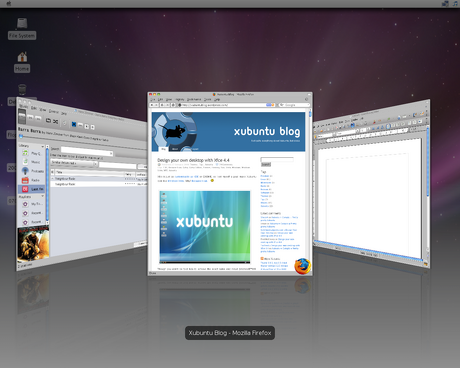
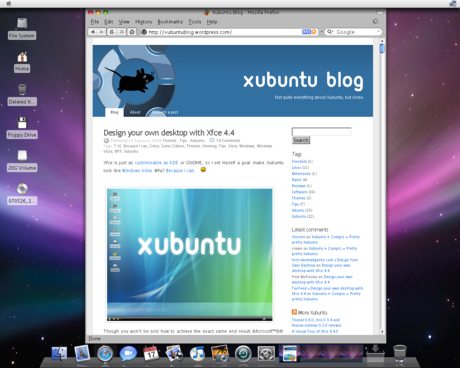
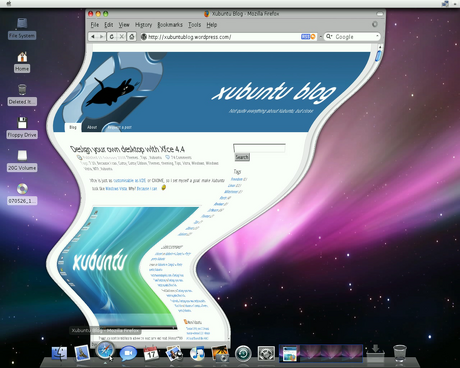
By popular demand, I decided to push the limits of Xfce’s customisability even further. This time, I would make it look like Mac OS X 10.5 “Leopard”.
Despite efforts like Mac4Lin, this task proved more difficult than trying to make it look like Windows Vista. Though I haven’t achieved the same degree of perfection as I did when replicating Vista, I still think I came pretty close.
First of all, you will need to download Mac4Lin and extract it somewhere. There’s a lot of material to use in there, but since I have already discussed it in part 1, I won’t elaborate here on how to change your wallpaper, font (to Lucida Grande), GTK theme, icon theme and xfwm4 theme or, for those who use Compiz, Emerald theme. Removing the bottom panel, setting a background image and resizing the top panel have also been discussed. In order to replicate the looks of OS X as close as possible, though, there still is a lot to be done.
Dock
One of the most noticeable things about OS X is its dock. Unfortunately, by default Xubuntu does not include such a dock by default. To have this functionality provided for, we will install Avant Window Navigator (AWN). Luckily, excellent instructions for installing AWN on Ubuntu 7.10 are already available, with the only difference being that we use Xubuntu and thus need to look in Applications->System instead of System->Administration.
Do note that, in order to use AWN, you need to have Compiz installed or have enabled Xfce’s own display compositing by checking “Enable display compositing” under the Compositor tab in Applications->Settings->Window Manager Tweaks.
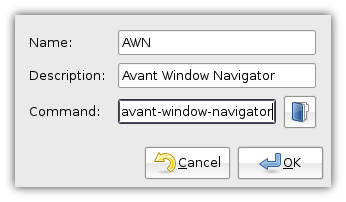
You can run AWN through Applications->Accessories->Avant Window Navigator. In order to have AWN ran every time you log in, you will also want to add AWN in Applications->Settings->Autostarted Applications.
The next step is making AWN replicate the OS X dock, which can be done through Applications->Settings->Awn Manager. If you click “Themes” on the left-hand side, you will get an overview of installed themes. By clicking “Add” you can install the AWN Dock Theme included in the Mac4Lin package you downloaded earlier, which you can then select and apply.
We then click “General” on the left-hand side to configure the looks in the Bar Appearance tab. I disabled round corners, set an angle of 26°, a height of 52 pixels and an offset of 14 pixels.
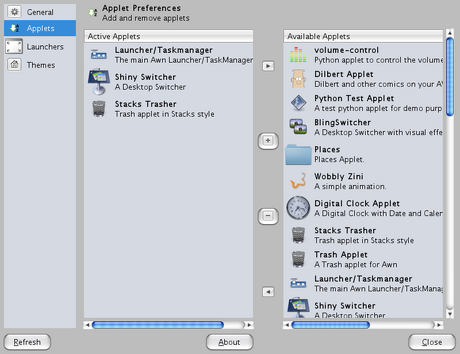
With that set, you can start adding applets to the dock by clicking “Applets” on the left-hand side. There are a whole range of applets to choose from, but for my OS X-like setup I opted for “Launcher/Taskmanager”, “Shiny Switcher” and “Stacks Trasher”.
The next step was adding program launchers to the dock (well, technically, to the “Launcher/Taskmanager”). This can be done easily by opening a Thunar window (Applications->Accessories->Thunar File Manager) and browsing to /usr/share/applications. You can then drag applications to the dock to add them. Right-clicking on a launcher allows you to change its icon.
Firefox
Also included in the Mac4Lin package is a Firefox theme, to make the Firefox experience similar to that of Safari. To install this, you open up the Add-ons window in Firefox from Tools->Add-ons, then click “Themes” on top. You can then drag the file FireFox Safari Theme - Vfox2.jar from the Firefox Addons folder into the Add-ons window. Another window pops up allowing you to install the theme. After the installation is finished, you will be asked to restart Firefox. After you have restarted, you can select “Use Theme” through the Add-ons window, after which you have to restart it once again.
To install the extensions, you just select the extension file, copy it (Edit->Copy), then paste it in Firefox’s address bar on top (Edit->Paste). Again, an installation window will pop up, and you will be asked to restart Firefox when the installation has finished. Upon the next start, the extension will be installed.
Cursor theme
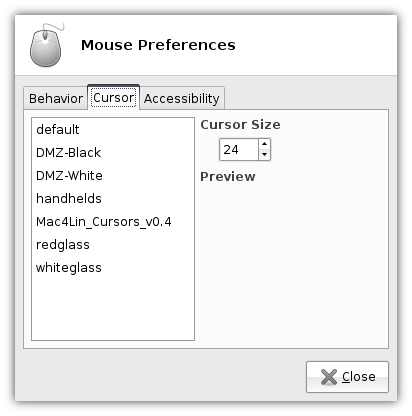
An interesting option which we didn’t explore in part 1 was the ability to change cursor themes. Conveniently, the Mac4Lin package also contains a folder named GTK Cursor Theme. Similar to how you installed icon themes, you extract the theme archive to /home/yourusername/.icons.
You can then open Mouse Settings (Applications->Settings->Mouse Settings), where the cursor should be located in the Cursor tab. Selecting the theme will warn you that the theme might not be applied until the next time you login.
Final thoughts
During the process of making my desktop look like OS X, I slowly started to appreciate the approach Apple has taken with its operating system. Instead of replicating the steps of the industry leader, they dare to be different. According to some, this has even led the industry leader to follow in Apple’s footsteps!
Unfortunately, all this innovating does not make creating a lookalike any easier. The most noticeable inaccuracy is in the GTK theme: because of its use of the pixmap engine, button images need to be stretched both horizontally and vertically, so they often look very odd compared to their OS X counterparts. Other themes such as Leopardish also come close, but no cigar.
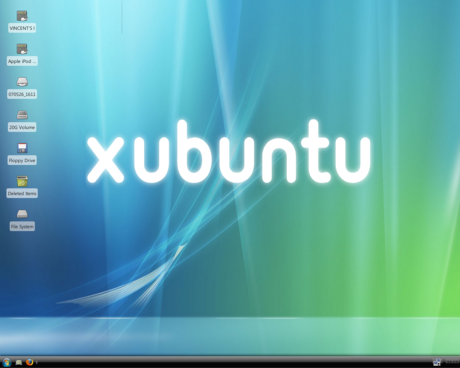
That said, the result ended up quite nice. When compared to the Vista “clone”, a world of difference can be found. Clearly, an extensive range of customisation options is available to Xfce users, which emphasizes that Xfce really does not lag behind GNOME nor KDE when it comes to customisability.
Those interested in moving application menus to their panel will be interested to know that it is possible, with support for Xfce’s panel. However, this is a very hackish solution and therefore strongly discouraged! As you’ll understand, I take absolutely no responsibility if it happens to end up in a disaster.

Design your own desktop with Xfce 4.4
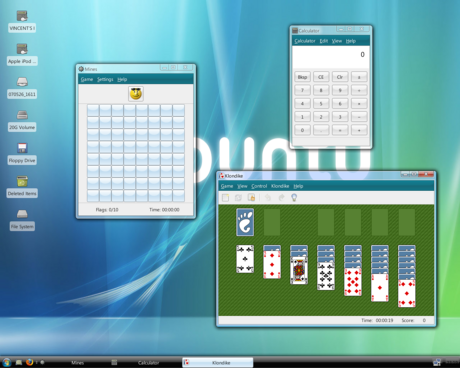
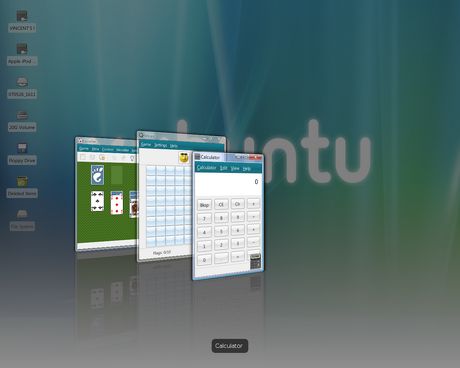
Xfce is just as customisable as KDE or GNOME, so I set myself a goal: make Xubuntu look like Windows Vista. Why? Because I can. ![]()
Though you won’t be told how to achieve the exact same end result (Microsoft™©® most likely would not appreciate that), this guide provides comprehensive instructions helping you make Xubuntu look the way you want it to. In any case, I would certainly not recommend such a setup for someone new to Xubuntu. Xubuntu is different than Windows; making it look similar is only confusing.
Panels
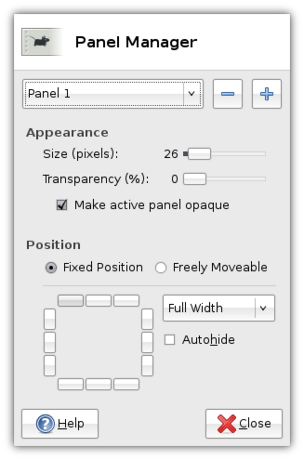
Since Windows comes with a total of a mere one panel, I had to remove one of Xubuntu’s two default panels. This task was easily done using Xfce’s Panel Manager, which can be opened by right clicking empty space on a panel and selecting Customise Panel, or by opening Applications->Settings->Panel Manager.
Removing the first panel was simply a matter or clicking the - while the target panel was selected in the drop-down menu. Most options in the panel manager are quite straightforward as long as your realize that they apply to the panel currently selected in the drop-down menu. For my setup, I just wanted to change the size of the panel to 30 pixels and set a background image.
Wait… Did I say “background image”? There is no option in the panel manager to set a background image for your panels! Luckily, that other Xubuntu Blog comes to the rescue.
Basically, what we will do is to override the settings of whatever GTK theme you are using to apply a background image to panels. The disadvantage of this method is that this will be applied to all panels.
The first thing you need is, obviously, a background image to use. It can be as much 1 pixel wide, if you like, because it will be tiled throughout the full width of the panel. This image needs to be saved in your home directory (e.g. /home/yourusername/). You can prepend the filename with a dot . to make it a hidden file, e.g. /home/vincent/.panelbackground.png.
Now, to apply this background image, open up a text editor like Mousepad (Applications->Accessories->Mousepad). You then have to open the file .gtkrc-2.0, but since that is a hidden file (starting with a .), it is not listed among the other files. Luckily, in the “Open” dialog, you can just enter .gtkrc-2.0 in the Location field (press Ctrl+L to make it visible if it is not) to open it. More likely than not, it is an empty file.
Now, paste the following into that file, obviously replacing .panelbackground.png with the name of your background image.
style "panel"

{
bg_pixmap[NORMAL] = “.panelbackground.png”
fg[NORMAL] = “white”

}
widget_class "*Panel*" style "panel"
widget "*Panel*" style "panel"
class "*Panel*" style "panel"
Note that the fg[NORMAL] = “white” sets the text colour to white, but you can edit that to whatever (supported) colour you like, or remove the line altogether to use your theme’s default.
And that’s it really! The next time you login, this image will be used as background image for your panel.
Wallpaper
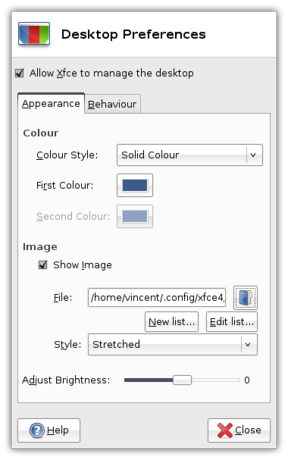
Of course I also wanted to use a wallpaper similar to Vista’s. Setting a background image for my desktop is a breeze, luckily. All that was needed was a click on the “browse” icon next to the File input field to select the image of my preference. If you want to, you can even make a list of files, of which one will be chosen each time you log in ![]()
GTK theme
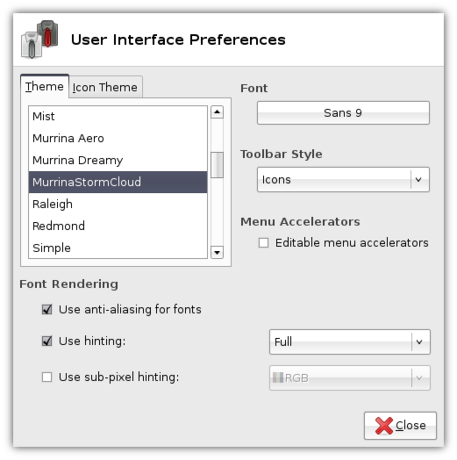
Next up is changing the GTK theme, which is often one of the most notable changes because it encompasses almost everything on your screen. Download a theme you like (I used Murrina Aero) and open it (with Archive Manager). Select Archive->Extract (or the equivalent option if you use another archive manager than Xubuntu 7.10’s default) and extract it to /home/yourusername/.themes (again, enter .themes in the location field if it’s invisible).
Then open Applications->Settings->User Interface Settings, where your preferred theme should now be listed in the theme list. It will be applied when you select it.
Icon theme
Using icon themes, it is possible to change the commonly used icons. For my Vista-like setup I selected the nuoveXT icon theme.
The process of installing an icon theme is similar to the process of installing a GTK theme. After you have downloaded the theme, you extract it, however, this time you extract them to /home/yourusername/.icons.
Just as when changing your GTK theme, you need Applications->Settings->User Interface Preferences to change the icon theme. This time, however, you switch to the Icon Theme tab (surprise), where you can select the preferred icon theme in the list.
Fonts
Ultimately, I also wanted to use Microsoft’s Segoe UI font. Unfortunately, it can only be obtained together with a copy of Windows Vista.
However, there are plenty of other beautiful fonts available (like Red Hat’s Liberation fonts) that can be installed easily. You just need the TTF files, which you need to place in the .fonts directory. It can then be selected, just as your GTK theme and icon theme, through Applications->Settings->User Interface Preferences. Click the button below Font, where your font should be listed under Family.
Xfwm4 themes
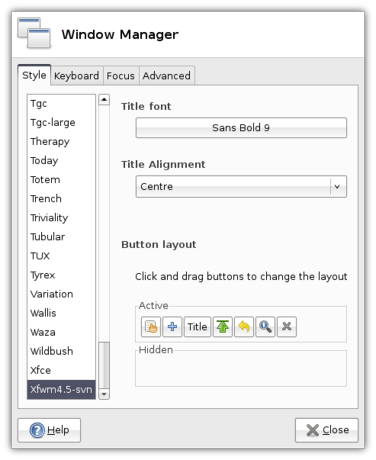
The theming craze isn’t over yet, because you can also theme your window borders. By default, Xubuntu’s Window Manager is xfwm4, which can be themed with xfwm4 themes.
First you need to find an xfwm4 theme you like. Once you downloaded that theme, extract it to the .themes directory in your home folder.
The theme can then be easily applied using Applications->Settings->Window Manager Settings. The theme should show up in the list on the left-hand side, selecting it will apply it.
Emerald themes
If you installed Compiz using Emerald as window manager, then changing window border themes is a little bit different.
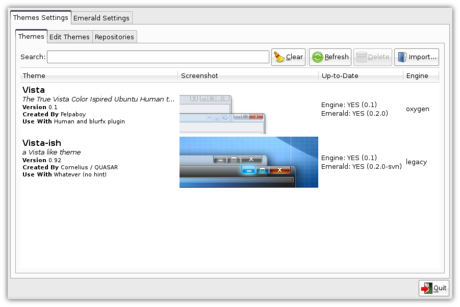
First, you need to get yourself an Emerald theme. Emerald themes are files that end in .emerald. I picked the theme included in the Aero-clone pack, aero_blue.emerald. To install the theme, you need to open Applications->Settings->Emerald Theme Manager. Click Import… and open the .emerald file. The theme will be selected when you click it in the list.
Conclusion
Xubuntu (and open source desktops in general) offers an enormous range of options allowing you to tweak the look to your own preferences. You can make it look as ugly or as pretty as you want. Heck, if you want to, you can make it look near pixel-perfect like another operating system!
The end result might not be perfect, but you can get very close ![]()

Thinkpad Configuration, part 2
Right, I'm almost done setting up the Thinkpad.
The keyboard is still taking some getting used to -- I hate having the Fn at the far left, where the Ctrl key should be, and I hate not having the Del/Home/End keys vertically aligned with the right edge of the keyboard. I also keep forgetting I have a working middle mouse button for Firefox. Too used to having to Ctrl-click tabs on the Toshiba. And . . . I love the scroll function on the synaptics touchpad. Love it. The pad itself I don't use much; I'm too used to trackpointers. Plus it's too easy to turn a drag motion into a sudden click. I do like the IBM trackpoint more than my Toshiba; the IBM one is more accurate and has a nicer surface.
Fingerprint use: for the time being, I've uninstalled fprint, and installed thinkfinger instead. Why the switch? Because thinkfinger works out-of-the-box with SLiM, and pam_fprint doesn't work with it at all. If it worked with SLiM, I'd switch back. Also, thinkfinger's enrollment seems to work better. I'm getting far fewer rejected scans. I'd like to file a feature request bug with fprint upstream to get SLiM supported, but its bugtracker mails aren't getting through to my devmail. dsd, you reading this? ![]()
I still haven't bothered playing with hdaps yet or finding out why it thinks my disk is unsupported. While on the subject of disks, it occurs to me that I really should have created a /usr/portage partition and formatted it as ReiserFS. ext3 is just too slow for Portage ops.
I at least solved my networking issues by adding a couple of required modules and undoing parallel startup. I also fixed a typo in conf.d/net. I don't plan on using NetworkManager any time soon, as it requires lots of Gnome dependencies. For now, I added a second network block to wpa_supplicant.conf:
network={
        key_mgmt=NONE
        priority=-9999999
}
I haven't tested it yet, but I think this should work for unsecured public access points. Actually, I think this was probably in wpa_supplicant.conf before I deleted everything and added my own config.
My desktop and development environment are just about complete; got my keys imported and my firewall setup and everything. Still haven't setup my system for Bluetooth or audio production yet. Or games. ![]()
As promised, I've made my working kernel config available. For all you Intel X3100 users, this may be of use in setting up uvesafb. Also, if you've got an IPW3945 ABG network card, this may be useful if you're using the in-kernel iwl driver. I've enabled the appropriate statistics options to use powerTOP, which is a very nice way to monitor power usage. I get about 2.8 hours doing basic wireless internet, docs work, etc. with my screen almost at full brightness. Not bad. I think I waited too long to get an Ultrabay battery; SCALE 6x is less than a week away!
Speaking of SCALE, I'm going. So I should probably get tickets & registration for me and my wife, yeah? Oh, and a hotel reservation. My new laptop has been such a distraction.
I've discovered a really unusual bug/behavior. I removed alsasound from the boot runlevel, in case I'm running on battery. Now, unless you blacklist them, your sound modules will still get loaded regardless, taking that much more power (even with aggressive soundcard power management enabled.) So what I had been doing was starting and stopping the ALSA initscript once my desktop was loaded. Here's the bug:
Starting and stopping ALSA this way actually kills all GTK theming in Xfce. The decorations revert to GTK defaults, the window colors go to their GTK defaults, the panel becomes ugly, you name it. All I have to do to re-apply the default (pretty) Xfce GTK theme is open one of Xfce's configuration utilities. Any of them. Isn't that bizarre? I have no idea why the hell that happens. Every time I stop ALSA. It's a minor nuisance, I guess.
On thinkpad_acpi and hotkeys:
It's a known bug that the brightness hotkeys don't work, but echoing values directly to /proc does. There won't be a fix for this any time soon, either. I've been in contact with upstream, submitting reports to their database, etc. Still have to go through and test the rest of my hardware (Bluetooth, etc.) and submit another report, but the outlook is not favorable for hotkeys. I still need to find a good program that will recognize the Fn-Home/Fn-End key command for brightness adjustments. xbacklight works, but I need keybinds to call it. Xfce has a built in keybind program, but it can't see Fn key combos. I'll have to find a sane xbindkeys setup (or similar app); there's probably something on ThinkWiki or the Gentoo Forums.
Signing off for now . . . maybe I'll see ya'll at SCALE? Come on by the Gentoo booth! Devs, users, groupies, etc. are all welcome. ![]()
