Backlight Change Notification?
Is there a decent (non-polling) way to get notified when a laptop panel’s backlight brightness changes? HAL exports methods to set and get the brightness level, as well as query the number of possible levels, but there doesn’t appear to be a way to get notified if the level changes. Calling org.freedesktop.Hal.LaptopPanel.GetBrightness() every five or ten seconds or so sounds like an awful idea, of course.
I’ve heard plans to use the XBACKLIGHT randr 1.2 property to do backlight setting, but I don’t think any drivers use this yet. Polling /sys is just as bad (why doesn’t sysfs or procfs support inotify, dammit!), and obviously isn’t portable anyway (not that HAL is particularly portable these days either).
Xubuntu upgrade: from Heron to Ibex
Usually I install Xubuntu afresh when a new release arrives. This time along, though, I felt like upgrading from Xubuntu 8.04 to Xubuntu 8.10.
The first thing to consider is that Xubuntu 8.04 is a “Long Term Support” release, meaning that it’ll receive security updates for a longer period of time than normal releases. Thus, people using this version won’t need to upgrade Xubuntu every six months when a new version is released. The consequence is that you will not be notified of a new normal release when it arrives.
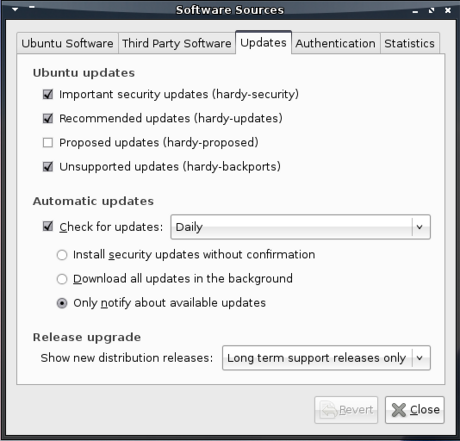
In order to be able to start the upgrade process, you’ll need to start the Software Sources application from Applications->System. In that application, under the Updates tab, you can select which new distribution releases you want to be notified of at the bottom. By default, this is set to Long term support releases only, but to upgrade to Xubuntu 8.10 you’ll want to set this to Normal releases.
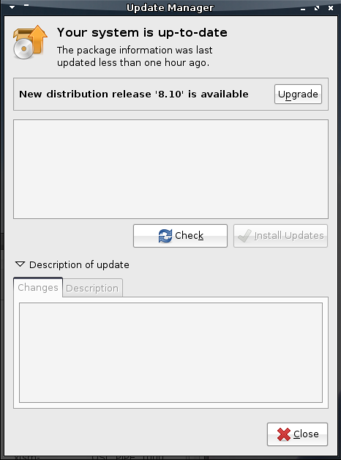
With that set, when you start the Update Manager (Applications->System), you will be notified that a new distribution release is available. To start the upgrade process, just click the Upgrade button on top.
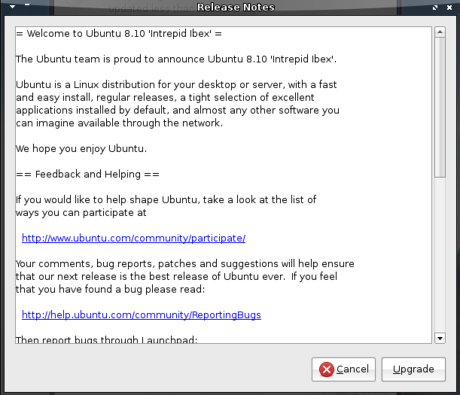
This will then pop up a screen containing the release notes of the new release, which unfortunately are Ubuntu-specific.
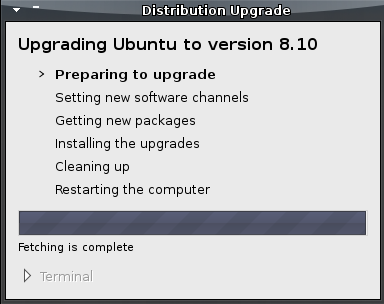
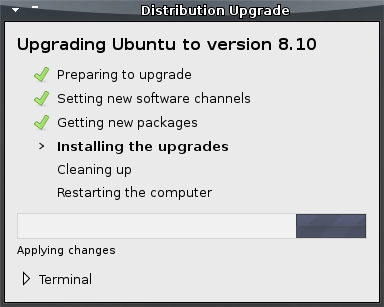
After confirming that you want to upgrade, Xubuntu will download an upgrade tool. It will start preparing the upgrade and will update your software sources to make sure you will be downloading software for the newer version. No need to worry though: if you press Cancel, the original configuration will be restored and any other edits the tool might have made will be reverted.
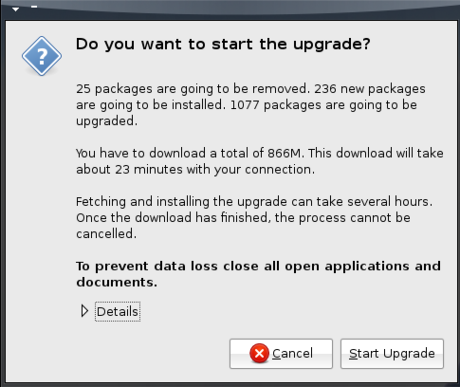
When information has been gathered about the upgrade, a new confirmation window will appear providing an overview of what is going to be done and giving you another chance to back off if you got scared. It also advises you to close all open applications to prevent loss of data – wise words indeed.
Of course, it is always recommended to make a backup of important documents and settings before you upgrade.
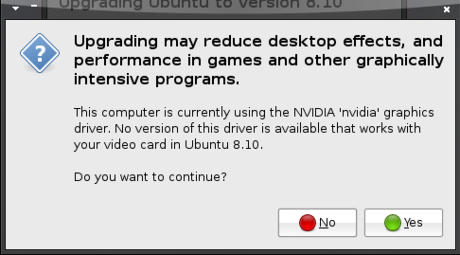
Before the upgrade could continue, a window popped up informing me that the (proprietary) driver for my graphics card was no longer available in the new version, giving me another chance to abort the upgrade. I opted to continue and take the risk of losing my shiny desktop effects (due to needing to use the open source driver), but was relieved to find that they still worked after the upgrade – I did not even need to redo the steps to install Compiz in Xubuntu. That said, this does not mean I recommend you to ignore the warning – I have too little knowledge of graphics cards and their drivers to be giving sensible advise on that.
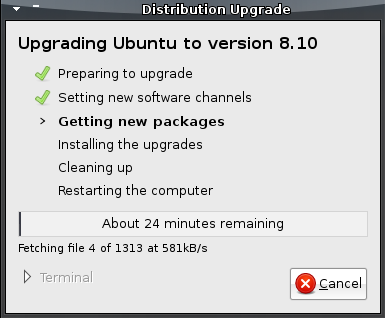
The upgrade tool will then start downloading the packages of the new version. This will take a while (essentially it’s downloading new versions of most of your applications in their entirety) – the final stage in which you will still have the option to cancel the upgrade. Isn’t that great? ![]()
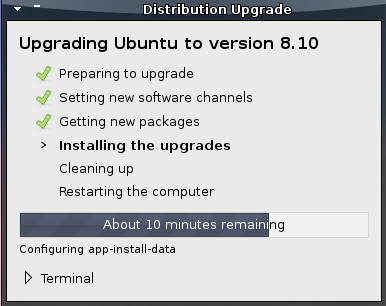
With the packages downloaded, the tool will start installing them – from this point on there’s no going back!
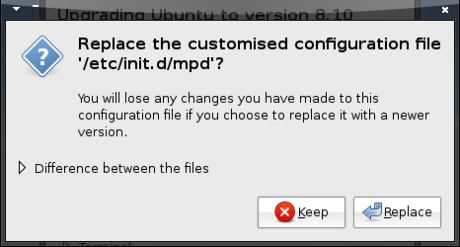
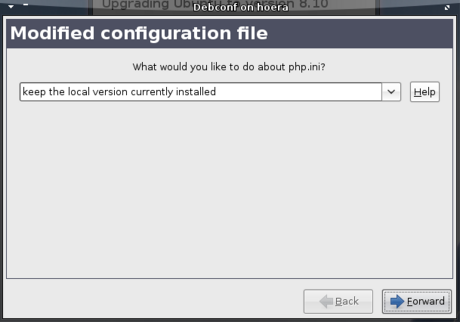
During the installation of the new packages, you might get some questions about newer configuration files overwriting older ones (I got most of these at the end of this process, so you can make yourself some coffee while it’s installing the bulk of new packages ![]() ). In most cases, you’ll probably want the new one unless you recognise the file and know that you need the alterations you made to that file. Going with the default options is often sensible as well.
). In most cases, you’ll probably want the new one unless you recognise the file and know that you need the alterations you made to that file. Going with the default options is often sensible as well.
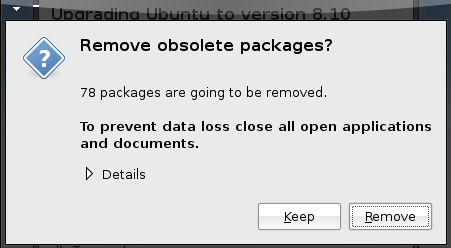
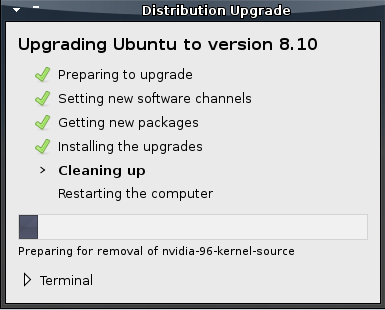
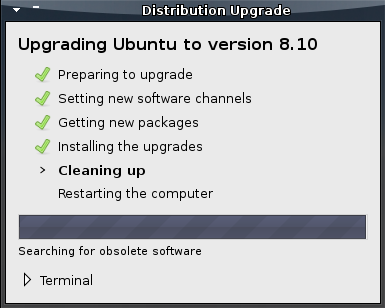
When the new versions are installed, the upgrade tool will try to remove as much cruft as it can find.
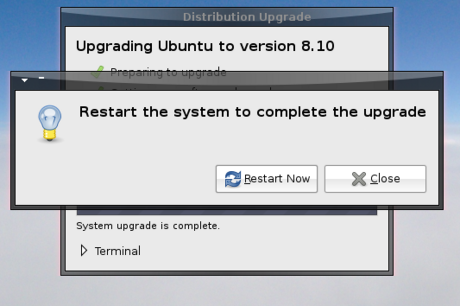
Finally, the upgrade process is almost complete – all it needs you to do to finish it off is to restart your computer and cross your fingers that the upgrade went smoothly and your system is still usable.
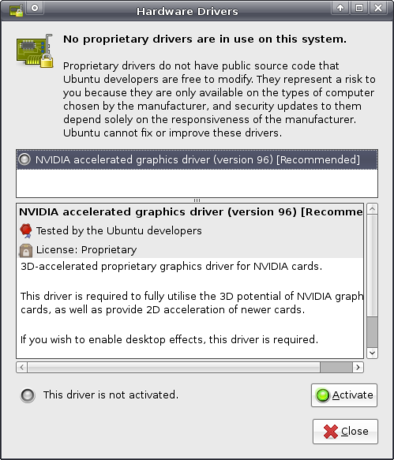
As said, I had been warned that the driver for my graphics card was no longer available, but luckily the Hardware Drivers application (Applications->System) pointed out that another proprietary driver was available that allowed me to enable Compiz again.
All in all, the upgrade was a generally a pleasing experience to me, and I hope and expect you will feel the same.
Ubuntu from your flash drive – easier than ever before
As you have probably noticed, new versions have arrived of Ubuntu, Xubuntu and other derivatives. One of the most exciting new features has received far less publicity than it deserves – the ability to “install” it onto your USB flash drive with just a few clicks.
The advantages are obvious: just plug your flash drive into a computer and run your favourite operating system. What’s more, everything you do — installing applications, saving documents, editing preferences — will be saved to your flash drive and will be available to you every time you run it!
The best news is that it’s astoundingly easy: all it takes is a few clicks.
Of course, there are a few requirements. First, you can only run it on computers that support booting from a USB flash drive – this is the case for most computers nowadays. Secondly, you must have a CD or a CD image. The latter can be downloaded free of charge – I, obviously, downloaded Xubuntu. Third, you’ll need to install usb-creator, the new application that is readily available in version 8.10 but which you can also download and install on version 8.04 (with Windows and Qt versions planned). And, last but not least, you’ll obviously need to have a USB flash drive.
Once installed, you can find it in your menu as Create a USB startup disk (on Xubuntu it is located under Applications->System, in Ubuntu this would be System->Administration, IIRC).
The first thing you’ll need to do is to insert the flash drive you’re planning to use. Usb-creator will then detect the drive – if multiple flash drives are inserted, you can pick from a list which one you want to use, and if the drive isn’t formatted yet usb-creator will give you the option to do so (note that this will destroy all files on it!).
The next step is inserting the appropriate CD into your CD drive, or loading the CD image you downloaded before by clicking Other….
Finally, you’ll need to configure whether you want all your documents, settings and applications to be discarded on shutdown (i.e. act as a regular LiveCD) or if you want to save them to your flash drive (this is called persistency, or persistent mode). If you pick the latter, you’ll also be able to select how much space you want to reserve for this.
Do note that usb-creator will not overwrite existing files on the drive – thus, if you want to use your entire drive, you’ll first have to delete all existing files.
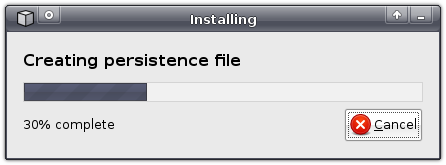
Now, with everything configured, click Make Startup Disk, and sit back and relax while usb-creator prepares your flash drive.
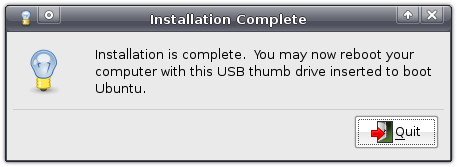
You can do something entirely different now, like reading the rest of this blog, viewing all my screenshots of usb-creator, whatever you like. Once usb-creator is finished, it will notify you that it’s done. All that’s left now is to boot your computer from your flash drive and have fun ![]()
Troubleshooting
If persistency does not work, you might need to edit the file text.cfg in the syslinux folder on your flash drive. Just replace the line default livewith the following lines, adding a new Start Xubuntu option to the boot screen the next time you boot. Note that you might want to replace occurences of “Xubuntu” with the name of the distro you’re using. This has been tested with Xubuntu 8.10;
default persistent

label persistent

  menu label ^Start Xubuntu

  kernel /casper/vmlinuz

  append  file=/cdrom/preseed/xubuntu.seed boot=casper initrd=/casper/initrd.gz quiet splash persistent
--
Xfce Commit Messages on IRC
This is a little dumb, but kinda fun. A week or 2 ago I set up a CIA bot in #xfce-commits on Freenode. If you have nothing better to do with your life than watch Xfce commit messages scroll by, feel free to join and idle with the rest of us losers.
Xfce 4.6beta1 Released
Hey all… we just released the 1st beta leading up to 4.6. Go check it out. Full list of changes here.
Xfconf – A New Configuration Storage System
I suppose others have written in broad terms about Xfconf, Xfce 4.6’s new configuration storage/retrieval system, but I guess an in-depth explanation is overdue and is probably up to me.
First, some background.
Xfce has used a configuration system called MCS (Multi-Channel Settings) for some time now, since 4.0 was released near the end of 2003. It’s inflexible and very monolithic. Only a single application (xfce-mcs-manager) is allowed to actually modify settings; all other applications can only query values. That means that the GUI settings dialogs have to run in the xfce-mcs-manager process. The GUI dialogs are implemented in shared libraries that are linked into the xfce-mcs-manager process at runtime. To add more confusion as to its purpose, xfce-mcs-manager also acts as an XSETTINGS manager, automatically proxying the settings stored in a “special” channel.
I had a few loosely-defined goals when designing Xfconf.
-
Keep the familiar “channels” concept from MCS, but make the namespaces for settings storage inside channels hierarchical.
-
The configuration storage daemon should be able to run without a GUI environment, and the client library shouldn’t have GUI dependencies.
-
Get the XSETTINGS manager out of the configuration daemon.
-
Integrate “kiosk mode” functionality directly into the configuration storage mechanism.
-
Native support for arrays/structs in the configuration store.
-
Provide a client library that’s easy to use and exposes commonly-used functionality.
-
No client application is special: any app can read or write any setting.
There were probably others, but those seem to be the ones that stick out in my mind after the fact.
MCS used a protocol involving a special X window, X selections, and X window properties to pass settings around at runtime. Obviously this kind of thing isn’t suitable for a configuration system that can run without a GUI, or even on a non-X11 system. So, that was right out. Given momentum over the past couple years, D-Bus seemed to make the most sense as an IPC method. So, the D-Bus API for Xfconf was born. (Please note that I don’t consider this frozen until we release 4.6.0 final. I’ll do my best not to remove or change existing interfaces, though.)
The rest of the story might sound rather gconf-like, and I guess it probably is. There’s a settings daemon (xfconfd) and a client library (libxfconf). Apps use the client library to fetch settings from and store settings to xfconfd. The daemon stores the settings on disk in a format of its choosing and manages the D-Bus interface. D-Bus gives us a few nice things for free; for example, xfconfd starts via D-Bus activation, so there’s no need to include it in any startup scripts or have client applications specifically start it. D-Bus also ensures that two instances of xfconfd aren’t running, fighting over the config store (well, unless you start a separate session bus daemon).
As for settings themselves, you have a channel that holds an arbitrary number of hierarchical properties. Channel names are simple ASCII text strings, like “xfwm4” or “xfce4-desktop”. Property names look a bit like path names and are, as I said, hierarchical. You can use this to logically organise properties inside your application. Xfdesktop is a good example of this, prefixing menu-related preferences with “/desktop-menu/” and backdrop-related prefs with “/backdrop/”. Xfwm4 is a terrible example of this, with all preferences prefixed with “/general/” for no apparent reason.
Anyhow, we support a variety of different data types: basically all of those supported and marshalable by dbus-glib, plus special 16-bit signed and unsigned types (though those two are pretty hacky at the moment and I’d like to be able to do those in a better way). The client library, libxfconf, lets you set commonly-used data types directly, and also has a generic interface for setting the others.
One thing I really like about libxfconf is its incredibly flexible support for array properties. Any property can be set to an array of values rather than a single value. The values in the array need not even be of the same type. Libxfconf has native support for setting array types, and also can directly map C structs to and from array types, automatically.
A final bit of usefulness is in libxfconf’s bindings mechanism. Libxfconf can “bind” an Xfconf property to a GObject property in your application. If the GObject property changes, then libxfconf will automatically update the value in the Xfconf store. If the value in the Xfconf store changes, libxfconf will automatically update the GObject property. This can greatly simplify the Xfconf code in your application. In your settings dialog, you simply have a single line of code to – for example – connect a GtkCheckButton’s “toggled” property to a boolean Xfconf property. If the user toggles the checkbox, Xfconf gets updated automatically. If the setting gets changed outside the application somehow while the settings dialog is open, the dialog gets updated automatically too. You can also use this functionality on the other “end” of the equation, too: if you use GObjects in your application, and your settings map to GObject properties on those objects, you can bind the properties there, too, and not have to manually take action when the user sets a setting in the settings dialog. Unfortunately, libxfconf only supports setting scalar properties now (not arrays), except for the special case of the GdkColor struct. Hopefully this will change in a future release.
We also include an “xfconf-query” application in the xfconf package, written mostly by Stephan Arts, which is a simple command-line Xfconf client. As you might guess, you can use it to query the values of Xfconf properties from the command-line, or from scripts. However, despite the “query” part of its name, it can modify Xfconf properties as well.
In Xfce 4.4 and below, we had the “XfceKiosk” system, which would allow you to lock down a desktop install so certain settings can and can’t be changed by particular users. It worked decently well, but was sometimes confusing to configure, and the application had to do special things to support it. Xfconf integrates a “locking” system whereby the system administrator can install a normally-formatted Xfconf configuration file with directives that instruct xfconfd to consider some properties unmodifiable by the user (and allows the sysadmin to set defaults too). This takes the burden away from applications to support a particular locking framework, as it’s natively built into the configuration system. (Unfortunately, as of this writing, the locking system isn’t working properly. It’ll definitely be finished by 4.6.0 final.)
So, I guess that’s it. If you’d like to get started with Xfconf, a good place to look would be the API documentation (please note that the API will not be frozen until 4.6.0 final). Otherwise, feel free to ask questions on the xfce4-dev mailing list.
Xfce Mailwach Plugin 1.1.0 Released
After a good two and a half years of being lazy, I’ve finally found some time to work on the Mailwatch plugin, and I have a new release ready too!
There’s lots of chewy goodness in this release. Here are some useful links:
As always, please report bugs over at the Xfce bug tracker.
Enjoy!
Xfce announces alpha release of version 4.6
After about a year and a half of development, the Xfce team has announced the alpha release of Xfce 4.6, codenamed “Pinky” “Pinkie”.
Xfce is the desktop environment and main reason for the existence of Xubuntu. It provides the file manager, panels and much more, keeping your desktop fast yet easy to use. Thus, Xfce is one of the most important parts of Xubuntu, and the 4.4 release has been enjoyed by many users of Xubuntu since it was released.
Obviously, the 4.6 release will be very significant for Xubuntu, and this is an important milestone in the road towards that release. While it was initially hoped that this release would make it into Xubuntu 8.10 (codenamed “Intrepid Ibex”), the Xfce release schedule suggests that, with three beta releases and two release candidated still scheduled, that target won’t be met. However, you can expect to see the new release in Xubuntu 9.04 (codename “Jaunty Jackalope”), and if you’re running 8.10 you can try the alpha release by adding the xubuntu-dev PPA to your software sources. (Note: at the time of writing this the packaged version is not this actual alpha but a version before that, however, this alpha will be packaged soon.)
The new version of Xfce comes with many new features. Xfce now has a new configuration backend called xfconf, similar to gconf, but simpler and easier to work with. This brings more flexibility and better integration between Xfce components. You can now control your desktop settings through the command-line – this is not only handy for people helping on IRC (i.e. there is no more need to guide the user through all kinds of settings dialogs – though, IMHO, that would be less confusing for the user), it also means automated scripts can easily update your settings. One use I see for this is being able to change your keyboard layout using a key combination, an oft-requested feature by programmers.
Speaking of key combinations: the confusing keyboard shortcut-themes have been removed and conflicts between keyboard shortcuts and window manager shortcuts are now easily resolved. All these new settings also come with updated settings dialogs, which can be started standalone as they are now, but also embedded into the settings manager – a feature of which Jannis made a screencast.
Furthermore, Xfce now ships libxfce4menu. This is a software library aiming to implement the menu standard also implemented by GNOME and KDE and partly implemented by Xfce 4.4. While it is currently in use only by the desktop and the Appfinder (the latter of which has been completely rewritten to support libxfce4menu), it paves the way for a proper menu plugin in the panel that you can actually edit.
Apart from the libxfce4menu support, the desktop manager xfdesktop has also received a few small improvements over the previous version. It has a redesigned preferences dialog, includes a few more options for the desktop background (such as colour saturation adjustment), and can now automatically start and stop managing a new desktop when you respectively plug or unplug a monitor.
Finally, the Xfce mixer plugin has been completely rewritten to use gstreamer. One effect this has is that Xubuntu will probably definitely be switching to gstreamer-based applications (Xubuntu used to include a xine version of Totem, the movie player, but recently switched to the gstreamer-based version). The biggest benefit this brings users is that it will automatically ask to search for additional media support when it is not installed yet, which happens e.g. when you try to play an MP3-file on a freshly installed Xubuntu.
All in all, though not as big as 4.4 was, this is shaping up to be another fine release of Xfce that has me looking forward to it.
Restoring the Xfce panels
One question that people looking for help with Xubuntu often have is some form of “my panels/taskbar/menu disappeared”. Unfortunately, this is something that happens quite frequently.
The good news is that this is fixed easily. All that’s required is to press Alt+F2 to bring forward the Run program window, and run the command xfce4-panel.
Not only is this a quick fix for the problem, it also makes for a quick blog post that might still help quite a few people ![]()
Update: Xubuntu 9.04 will include Xfce 4.6 which should be able to automatically restore the panel in the event of a crash. Hooray ![]()
Update to that: According to willerlite, the panels do not automatically re-appear. Hmm :S
Git Snapshot Versioning?
With our SVN repository, we version SVN snapshots using the SVN revision number – we tack “svn-r$REVISION” on the end of the normal version number. This works well, and it’s easy to tell if a given snapshot is newer or older than another one.
Git doesn’t have revision numbers. Commits are identified by SHA1 checksums. Since these are “random,” there’s no way to tell chronological order. How are other people doing git snapshot versioning? The best I’ve come up with is to parse git-log output to get the date and time of the last commit, and then do something like X.Y.Zgit-YYYYMMDD.HHMMSS… which is rather long and ugly. I guess it would be ok to use a 2-digit year here, though. And maybe drop the seconds bit, but I think it’s decently possible to have more than one commit in the same minute. But still… long and ugly.
Any other ideas? My requirements are simple: easy to tell based on just the version string if a snapshot is older or newer than another, must be able to automatically generate this tag, and must be able to identify the exact HEAD that the snapshot was made from.
